SwiftUI本地推送通知教程:UserNotifications在Swift中的实现方式
简介
消息推送相信在很多人的眼里都不陌生了吧?像即时聊天微信,好友发信息给你时会在顶部弹下小窗口提醒你。也像是在影院APP预订了电影票,在开场前一小时你也会收到提醒。这类推送是需要经过后端发送请求的,需要服务器发送推送请求,又或者使用如极光推送等第三方渠道。
那么如果我们的APP不需要连网呢?这是不是就不能使用消息推送了?不是的,苹果还提供给我们本地消息通知服务,即便APP不连网也能使用,功能也很强大可靠。本地时钟的应用场景很广泛,例如手机上的时钟、日历等。
那么你知道如何去实现它吗?这篇文章将告知你答案,同时以两个小案例作为例子,以便更好地去理解它。
笔者环境
Xcode - Version 11.5 (11E608c)
Swift - version 5.2.4 (swiftlang-1103.0.32.9 clang-1103.0.32.53).
权限获取
UserNotifications 是 iOS10 推出来的框架,因此你只能在 10 或以上的版本使用它。推送服务和以往一样,也是需要用户授权的,当用户同意后才能正常注册消息通知,当用户拒绝时应该引导用户去打开APP的通知权限。利用requestAuthorization方法弹出并获取通知权限,接收的参数options是具体的授权选项,一般有弹窗、未读数量图标和声音即可,并在回调闭包中可以获取授权结果和错误。
1 | UNUserNotificationCenter.current().requestAuthorization(options: [.alert, .badge, .sound]) { (status, err) in |
status 为布尔类型,true 表示用户同意,false 即拒绝。在此种情况下,我们可以使用弹窗去引导用户去打开通知权限,需要明确告知用户打开后有什么好处,如果关闭会造成什么影响等等。如果让用户手动打开设置,找到APP,为APP开启权限,这样未免太过复杂,所幸的是可以通过以下代码为用户直接跳转至该应用的权限设置中心。
1 | guard let url = URL(string: UIApplication.openSettingsURLString) else { return } |
应弹窗提示用户,待用户同意后才跳转至设置,不然容易引起用户的不满心理。
触发器
本地消息通知一般有以下三种类型的触发器,它们都是继承于类UNNotificationTrigger:
- UNTimeIntervalNotificationTrigger - 在经过特定的时间后触发本地消息推送;
- UNCalendarNotificationTrigger - 在特定的时间点触发本地消息推送;
- UNLocationNotificationTrigger - 在进入或离开特定的地理位置时触发本地消息推送。
UNTimeIntervalNotificationTrigger
手机上的时钟用过吧,里面的计时器功能就可以用UNTimeIntervalNotificationTrigger实现,比如开始计时30分钟,那么在计时器完成的时候就是使用通知提醒。
那么设置在经过特定的时间后触发本地消息推送,一般都经由以下几个步骤:
- 首先创建
UNMutableNotificationContent类,设定标题和内容,如果你有子标题还可以设置子标题,一般很少见到会设置子标题的应用。 - 创建触发器,这里就是
UNTimeIntervalNotificationTrigger,设定执行秒数和是否循环通知。 - 创建通知请求
UNNotificationRequest,这里需要指定通知的identifier,内容和触发器,至于identifier,你可以随意定义。 - 最后将通知请求添加到系统的通知中心
UNUserNotificationCenter即可。
例子,创建一个通知,在5秒后执行消息推送。实例代码展示如下:
1 | let content = UNMutableNotificationContent() |
有一处小 Tips,UNTimeIntervalNotificationTrigger创建时的repeats选项,如果你设定为循环通知时,即需要每隔N秒触发一次通知,那么你必须至少设置为60秒的时间间隔,如若低于60秒,你将会得到这样一条错误。
1 | *** Terminating app due to uncaught exception 'NSInternalInconsistencyException', reason: 'time interval must be at least 60 if repeating' |
UNCalendarNotificationTrigger
手机上的日历用过吧,在新建日程的时候,你可以选择一个提醒时间,这样它就会在你设定的提醒时间提醒你,这种情况就很适合用UNCalendarNotificationTrigger去实现。
举个例子,我们要在每晚7点提醒用户看公众号。
1 | let content = UNMutableNotificationContent() |
1 - 创建时间元件,19点即为晚上7点
2 - 创建UNCalendarNotificationTrigger对象,并将dateComponents赋值到dateMatching,repeats为true,重复在每天19点收到通知提醒。
UNLocationNotificationTrigger
这个触发器不在此篇文章讲述,留给你们自己去实现和测试结果。
图标
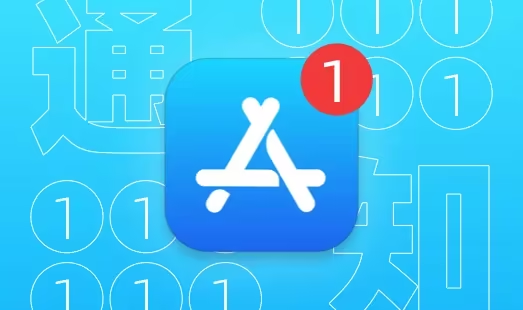
还记得刚刚设置的属性badge吗,我们设置值为1,这意味着在iPhone桌面上的应用图标在收到通知时,右上角圆点内所展示的数字就是badge的值。
这个属性值是applicationIconBadgeNumber,它是UIApplication的属性,设置为0即为隐藏,默认也是0。
1 | UIApplication.shared.applicationIconBadgeNumber = 0 |
消息推送回调代理
接收用户对消息推送的反馈事件,比如说应用在后台收到了通知,用户点击了这条通知进入到了APP里面,我们需要获取这个事件去做一些处理,比如跳去某个界面,这里例子不讲这么复杂,只通过简单地判断用户是通过哪个通知进来的。
接收回调代理事件前,需要遵循UNUserNotificationCenterDelegate协议,并设置delegate接收的对象。
1 | extension AppDelegate: UNUserNotificationCenterDelegate {} |
在Swift语言中,可以通过extension扩展类遵循的协议,并在extension。
当应用在前台运行时,收到的是这个-userNotificationCenter:willPresentNotification:withCompletionHandler:代理方法。UNNotification对象存储了传递到应用的一些数据,通过此对象可以拿到此条通知关联的触发器notification.request.trigger,从而判断其类型。
1 | func userNotificationCenter(_ center: UNUserNotificationCenter, willPresent notification: UNNotification, withCompletionHandler completionHandler: @escaping (UNNotificationPresentationOptions) -> Void) { |
当应用在后台,或者被杀死的状态下,收到的是这个-userNotificationCenter:didReceiveNotificationResponse:withCompletionHandler:代理方法。此方法接收UNNotificationResponse类型的参数,它里面包含notification属性,因此可以参考上面的代码进行触发器的判断。
1 | func userNotificationCenter(_ center: UNUserNotificationCenter, didReceive response: UNNotificationResponse, withCompletionHandler completionHandler: @escaping () -> Void) { |
总结
本地通知有三种类型的触发器,分别是UNTimeIntervalNotificationTrigger、UNCalendarNotificationTrigger和UNLocationNotificationTrigger。
UNTimeIntervalNotificationTrigger在设置循环通知时,所设定的时间隔不能低于60秒,否则会报运行时错误。
https://www.cnblogs.com/GarveyCalvin/p/representtable-uikit.html
Demo 源码下载
我已经把 Demo 上传至 GitHub 上面,项目名字是 SwiftUI-Tutorials,目录名为GCLocalUserNotification,有需要的朋友可以去下载运行一下,当然你也可以跟着文章去做一遍,这样更有利于你掌握此方面的知识。